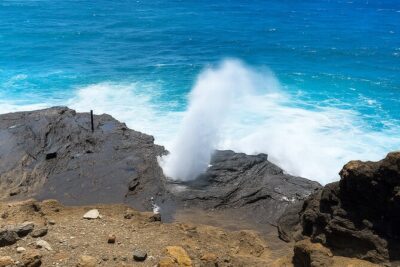
REVIEW · OAHU
Waikiki: Honolulu Beginner Scuba Diving with Videos
Book on GetYourGuide →Operated by Try Scuba Diving- Hawaii · Bookable on GetYourGuide
Waikiki makes a first scuba try feel doable. You get beginner-friendly coaching right in Honolulu’s Magic Island Lagoon, plus free GoPro videos so you’re not just thinking about what to do next. The one thing to keep in mind: fish sightings can vary if water clarity isn’t at its best that day.
I especially like that the lesson starts simple, with a quick shore briefing and practice in waist-deep water (about 3 feet) before you go any farther. That approach helps you get your body and breathing working together fast.
This is a family option for adults and kids age 10 and up, but it’s not for everyone—people with heart or back problems, pregnant women, and kids under 10 should skip.
Key takeaways before you go
- 10–15 minute shore briefing to learn the basics before you get in the water
- Waist-deep practice (about 3 feet) so you can breathe and handle gear without panic
- One-tank, 1.25–1.5 hour session that fits into a morning or afternoon schedule
- Free GoPro videos included for instant memories you can share
- Magic Island Lagoon is the focus, a calm-feeling area for first-timers
- Visibility affects what you see, so the marine life experience can be more or less active day to day
In This Review
- Magic Island Lagoon in Waikiki: your first underwater lesson spot
- The 1.25–1.5 hour flow: briefing, waist-deep practice, then guided underwater time
- Gear, instructor coaching, and the real meaning of beginner-friendly
- What you’ll see under the water: fish, marine life, and why clarity changes everything
- GoPro videos included: turning a short lesson into a lasting memory
- Price and value in Waikiki: why $79 can make sense
- What to bring (and what to skip) so you’re comfortable
- Who this is best for (and who should not go)
- Logistics that matter: meeting time, language, and what you pay for
- Tips to get the best experience in your first session
- Should you book this beginner scuba try in Waikiki?
- FAQ
- What’s the duration of the beginner scuba session?
- Do I need prior scuba experience?
- Is it suitable for kids?
- Where do I meet the group?
- What’s included in the price?
- What should I bring with me?
- What conditions should I expect for the tour?
- Is the tour offered in English and Spanish?
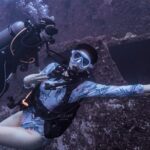
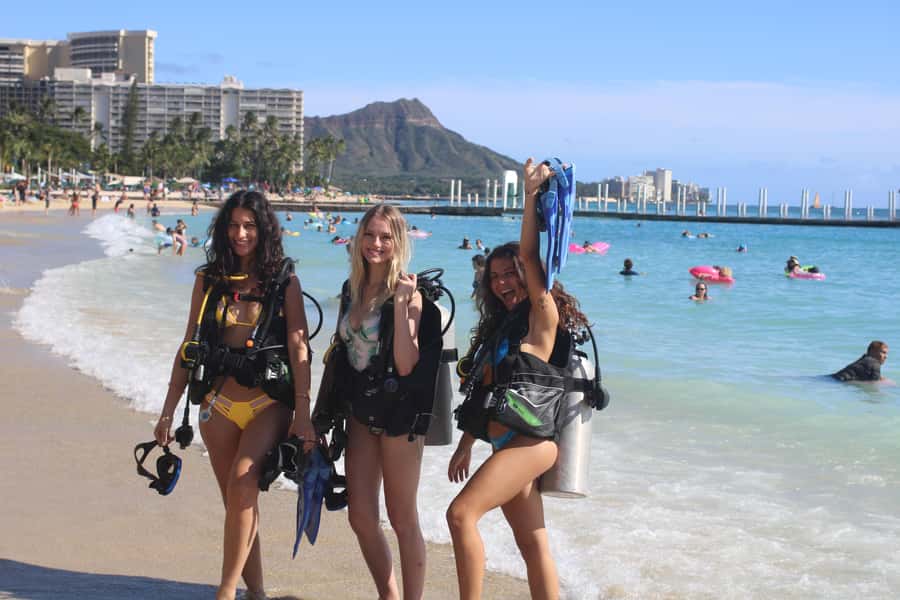
Magic Island Lagoon in Waikiki: your first underwater lesson spot
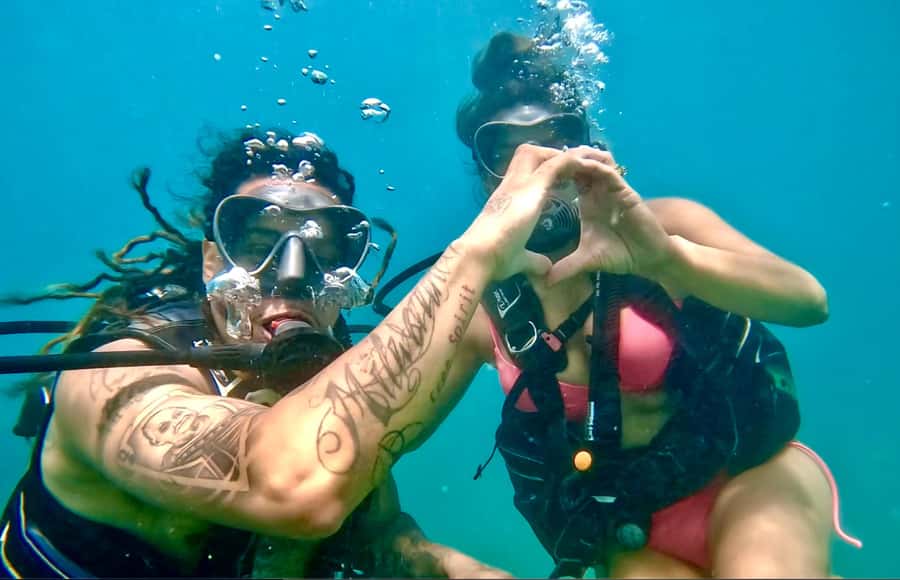
Waikiki’s shoreline is busy on land, but Magic Island Lagoon has a different vibe once you’re in the water. This is the kind of setting you want for a first scuba experience: it’s designed for guided entry, with conditions that suit beginners learning how to breathe underwater and move while wearing scuba gear.
I also like that the whole experience is built around one clear goal—getting you comfortable enough to explore and see real marine life close to you. That matters, because a beginner’s biggest stress is usually not the ocean itself. It’s not knowing what you’ll need to do next while also trying to enjoy it.
You’ll get a professional instructor who leads you through the process, and English- or Spanish-speaking guidance is available. Instructors you might encounter (based on past participants’ notes) include Alex, Ryan, Nick, Faith, and Scott—people praised for keeping first-timers calm and explaining gear use clearly.
What you should expect to feel: focused, slightly awkward at first, then more relaxed as breathing and buoyancy click.
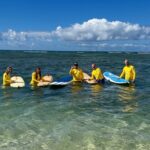
The 1.25–1.5 hour flow: briefing, waist-deep practice, then guided underwater time
This experience is short on purpose. A beginner session works best when you’re not rushed, and you’re not underwater for too long while you’re still learning basic skills.
Here’s the typical rhythm:
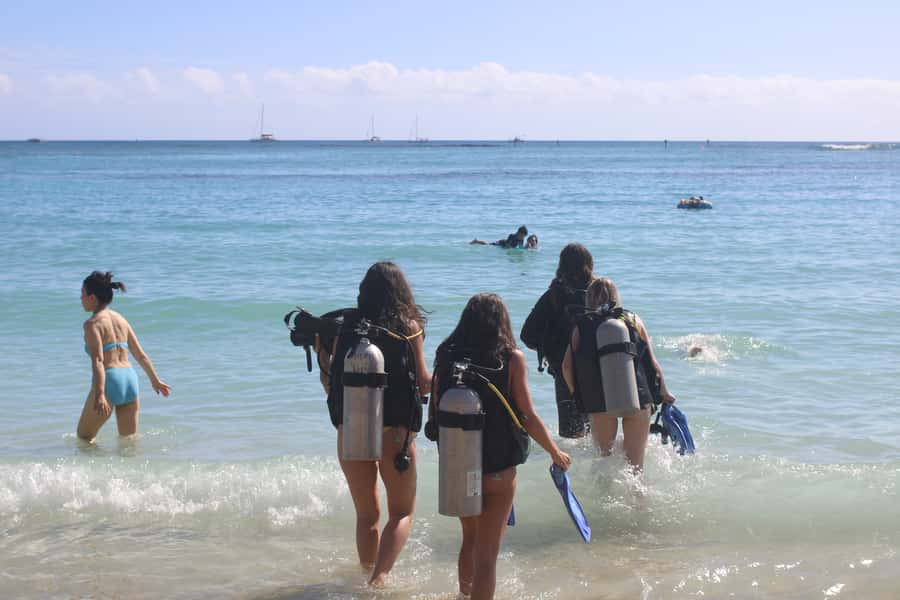
1) Arrive and check in early
Plan to be there about 30 minutes before start time. The meeting check-in is near life guard tower 1G. This isn’t the moment to be “almost ready”—you want time to handle gear checks, bathroom breaks, and any quick questions before your briefing starts.
2) Shore briefing: 10–15 minutes
Your dive professional gives a short lesson on essential skills and what to do underwater. Past participants highlighted how clearly instructors walk you through the equipment and the plan, which is huge for first-timers. One person noted the lesson was easy going and easy to follow, and that matches how the pacing is designed.
3) Get comfortable in waist-deep water (about 3 feet)
Before you go farther, you practice in shallow water—around 3 feet deep. This is where you learn how breathing works through the regulator, how to manage your gear, and how to handle your body position. If you’ve ever felt nervous about water, this step helps because you’re not immediately “all in.” You’re building comfort while still standing close to the bottom.
4) Guided underwater exploration
Once the instructor feels you’re comfortable (and once you can demonstrate the basics), you continue with guided underwater time to look at fish and marine life. This is where the Magic Island Lagoon setting becomes the star. You’ll also record video, and you’ll come away with footage you don’t have to beg for later.
Time matters: the whole session usually lands around 1.25–1.5 hours, depending on comfort level and group size.
One practical drawback: if your group is bigger or you need extra time feeling confident, your underwater viewing time can shift. That’s normal—just don’t judge the experience based only on how quickly you move through the steps.
You can also read our reviews of more scuba diving tours in Oahu

Gear, instructor coaching, and the real meaning of beginner-friendly
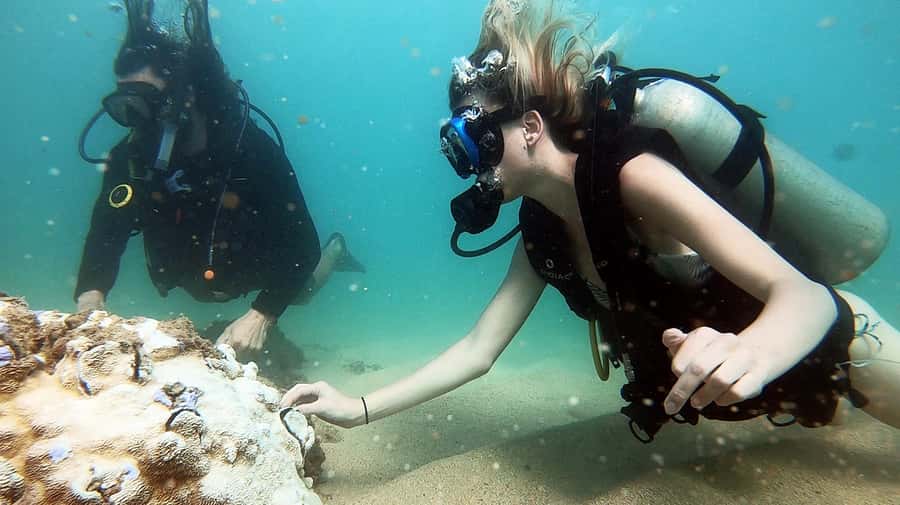
You don’t need prior scuba experience. All the scuba equipment is provided, and that changes the whole math. Without needing to buy or rent gear separately, the price feels more fair—and you can focus on learning.
What makes this beginner setup work is the coaching style. Instructors are often praised for being patient, professional, and practical. Several participants specifically called out how their guides helped with fears and helped them calm down when nervous.
Here’s what to know so you’re mentally prepared:
- You’ll learn how the equipment works before it’s time to use it fully underwater. If you’ve never worn scuba gear, expect it to feel bulky at first.
- Weights can be an issue for some bodies. One person pointed out they would have liked more weights available for sinking help. That’s worth keeping in mind if you tend to float high or you’re smaller in build—ask questions during briefing so your setup is dialed in.
- You’ll be guided, not left to figure it out. The best part of a good first session is when you can concentrate on breathing and staying comfortable while someone else handles safety and direction.
Also, because this is a guided program, you can ask small questions as you go. That includes questions about what you should do if you feel off-balance, how to adjust your position, or when to take a breath.
My advice: go in expecting a learning curve, not expecting perfect calm right away. The goal is progress in an hour, not mastery in 10 minutes.
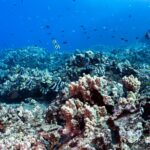
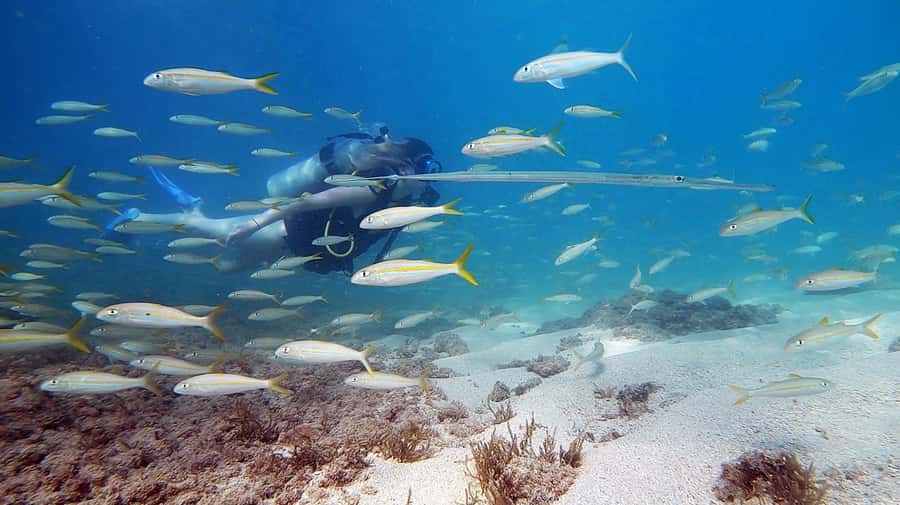
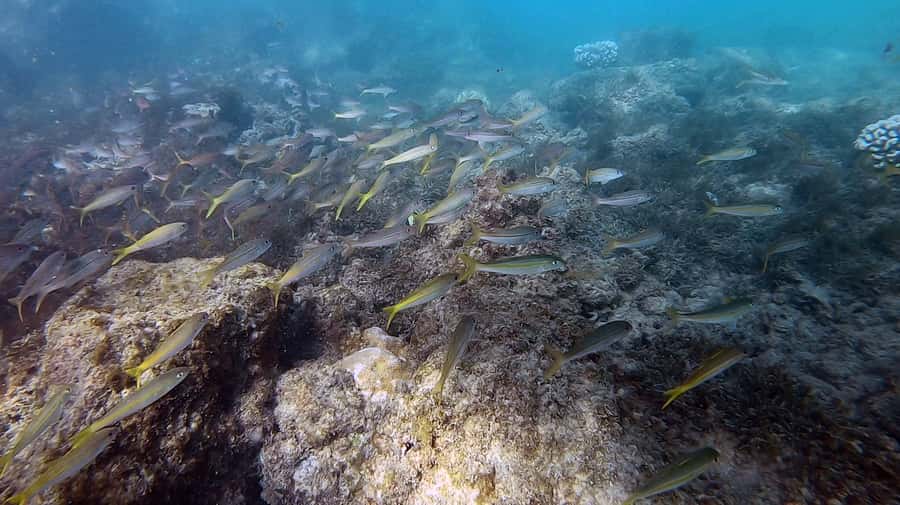
What you’ll see under the water: fish, marine life, and why clarity changes everything
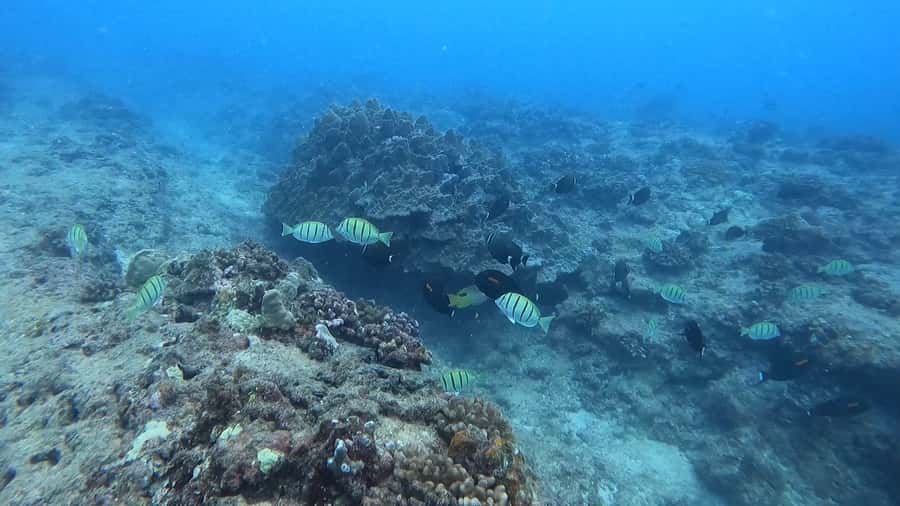
The tour is built around a marine life guarantee and guided viewing in Magic Island Lagoon. In other words: you’re not just paying for the gear and the novelty—you’re supposed to see wildlife.
But the ocean runs on its own schedule.
One participant noted they didn’t see as many fish because the water wasn’t very clear that day. That doesn’t mean the experience fails. It just means your “greatest hits” under the water can be more or less visible depending on conditions.
So how should you plan your expectations?
- Expect real marine life rather than guarantees of any specific species count.
- Expect variable visibility day to day.
- Bring the right mindset: watch behavior, not just appearance. Even when visibility is lower, you can still notice movement and the shapes of fish near the reef environment.
If you’re the type who loves photos, this is another reason the included video matters. You can still capture the moment even if the water isn’t crystal-clear.
GoPro videos included: turning a short lesson into a lasting memory
For many first-timers, the biggest fear is freezing up mentally: What do I do with my body? Am I doing it right? How do I look underwater?
The free GoPro videos help reduce the “performance pressure.” You’re not relying on your own shaky phone skills from the surface. And you can rewatch later to learn how your buoyancy and body position looked—useful even if you’re only doing this once.
It also makes the experience feel more like a real activity with keepsakes, not just a try-it-once stunt. For $79, that’s a big part of the value.
Price and value in Waikiki: why $79 can make sense
At $79 per person for about 1.5 hours, this is a straightforward, entry-level option. The real question isn’t just the price tag—it’s what you’re getting and what you’re not.
What you do get:
- Scuba equipment
- Instructor guidance
- Video capture (included)
What you don’t get:
- Swimwear
- Food and drink
- Sunscreen
- Towel
- Hotel pickup/drop-off
That means the value comes from simplicity. You’re paying for an instructor-led, gear-included experience designed for first-timers, without the extra costs that often pop up when you add transport, gear rental, and add-on media separately.
My practical take: if you’re already in Waikiki and you can walk or take a quick local ride to the meeting point near life guard tower 1G, you’ll get better value. If you need taxi-style transport from farther away, factor that in.


What to bring (and what to skip) so you’re comfortable
This is an ocean activity, so your “packing list” should be simple and realistic.
Bring:
- Swimwear
- Towel
- Biodegradable sunscreen
- Passport or ID card (copy accepted)
Skip:
- Heavy “just in case” items. You’re not going to want extra stuff on you before getting into the water.
And remember: this tour takes place rain or shine. In Hawaii, rain usually isn’t a deal breaker, but it can change how you feel about getting in and out. Dress so you can handle quick temperature shifts.
Who this is best for (and who should not go)
This is a beginner-friendly option for adults and children age 10 and up. It’s a good fit if you want:
- A structured intro to scuba basics
- A short session (about 1.25–1.5 hours)
- A professional instructor guiding you from shore into shallow water
It may be especially appealing if you’re nervous. Many people mention instructors who are patient with fear and quick to calm you down if you panic.
This is not suitable for:
- Children under 10
- Pregnant women
- People with back problems
- People with heart problems
If you’re in any medical category you’re unsure about, check with a clinician before booking. Don’t “tough it out” with physical risk.
Logistics that matter: meeting time, language, and what you pay for
Plan to arrive early. The meeting point is near life guard tower 1G, and you should check in 30 minutes before the scheduled start.
Language is English and Spanish, which is helpful if you want instruction you can fully understand without guessing.
Also, note what isn’t included: there’s no hotel pickup and drop-off. So build in travel time to the meeting location on your schedule.
Tips to get the best experience in your first session
These are small things that can make the difference between “I tried it” and “I loved it.”
- Ask questions during the shore briefing. If something feels unclear, ask before you get in.
- Tell the instructor if you feel nervous. This tour is designed for beginners, and the coaching style is built around helping people calm down.
- Watch your body position in shallow water. The waist-deep practice step is your training ground. Use it to find comfortable breathing and balance.
- Consider your weight setup. If you’re worried you’ll float, mention it early. One participant specifically wished there were more weights available for people who need extra help sinking.
- Treat visibility like a variable, not a fail. If the water isn’t super clear, your enjoyment can still come from movement, texture, and the simple fact that you’re seeing the underwater world up close.
Should you book this beginner scuba try in Waikiki?
I think it’s a smart booking if you’re in Waikiki and you want a real beginner scuba experience with guidance, equipment, and video included.
Book it if:
- You’re age 10+ and you’re comfortable being in the ocean in a guided setting
- You want a short, structured introduction with waist-deep practice
- You care about capturing the moment (the included GoPro video is a real plus)
- You’d rather pay for an all-in instructor-led session than manage gear and lessons on your own
Skip it if:
- You don’t fit the medical restrictions listed (heart/back issues or pregnancy)
- You need hotel pickup
- You’re expecting guaranteed, crystal-clear visibility and lots of visible fish no matter what
If you can handle light nerves and you’re open to learning in shallow water first, this is exactly the kind of first-time activity that turns a vacation day into a memory you’ll actually want to watch again.
FAQ
What’s the duration of the beginner scuba session?
The tour usually lasts 1.25 to 1.5 hours, depending on group size and how comfortable you feel in the water. It’s a one-tank experience.
Do I need prior scuba experience?
No. No prior scuba experience is required. You’ll get a briefing and practice in waist-deep water first.
Is it suitable for kids?
It’s suitable for adults and children age 10 and up. It’s not suitable for children under 10.
Where do I meet the group?
You should check in near life guard tower 1G and arrive 30 minutes before the tour start time.
What’s included in the price?
Included items are scuba diving equipment, videos, and an instructor.
What should I bring with me?
Bring swimwear, a towel, biodegradable sunscreen, and a passport or ID card (a copy is accepted).
What conditions should I expect for the tour?
The tour takes place rain or shine.
Is the tour offered in English and Spanish?
Yes. The instructor offers instruction in English and Spanish.