REVIEW · OAHU
Honolulu Sunset & Light Painting Experience
Book on Viator →Operated by Oahu Photo Tours · Bookable on Viator
Night photos start at sunset. This Honolulu experience mixes classic Oahu viewpoints with hands-on night shooting—tripods included—so you leave with techniques you can actually use back home. Along the way, guides like Mac and Andrew focus on practical settings and creative prompts, not just scenic stops.
I especially love the way the tour teaches you to see the scene like a photographer. You’ll work through light-painting tools at Makapu’u and get real long-exposure guidance, including iPhone tips for exposure and framing. The second big win is the small group size (max seven), which makes it easier to get help fast instead of waiting your turn.
One thing to consider: the tour needs good weather, and there’s no food or bottled water included. If the skies don’t cooperate, you may miss portions of the plan and you’ll want to be prepared for a night outing without snacks.
In This Review
- Key highlights to know before you go
- Honolulu Zoo start point and Waikiki pickup: plan your timing
- China Walls: the sunset stop that sets up your whole night
- Makapu‘u Point: a short gear-and-sky setup that matters
- Makapu‘u Beach: stars, lighthouse views, light painting, and steel wool
- Light painting: why it’s worth the effort
- Steel wool photos: the adventurous moment
- Dark-sky payoff
- Tripods and iPhone night tips: the real skill you carry home
- Guides and group size: how Mac and Andrew shape the vibe
- What’s included, what’s not: pack smarter for a night out
- Weather reality: what happens if the sky doesn’t cooperate
- Is it worth your time in Oahu? My value check
- Should you book the Honolulu Sunset & Light Painting Experience?
- FAQ
- How long is the Honolulu Sunset & Light Painting Experience?
- Where does the tour start and end?
- Is hotel pickup available?
- What equipment is included?
- Does the tour provide bottled water or food?
- What happens if the weather is bad?
Key highlights to know before you go
- Small group size (max 7): personal attention for setup, framing, and timing
- Hands-on light painting + tripod time: not just watching, you’ll shoot
- China Walls sunset photo stop: a strong start before the sky gets dark
- Makapu‘u Point setup for the night sky: gear practice right at the lookout
- Makapu‘u Beach creativity: stars, lighthouse views, light painting, and steel wool photos
- Free admission at each stop: you’re paying for the experience, not entry fees
Honolulu Zoo start point and Waikiki pickup: plan your timing
The tour starts at Honolulu Zoo, 151 Kapahulu Ave, Honolulu, HI 96815. It also ends back at the meeting point, so you’re not trying to figure out transfers after dark. If you’re staying in Waikiki, pickup may be available at selected hotels—just call to confirm your exact pickup location.
You’ll receive confirmation at booking time, and the ticket is mobile-friendly. The itinerary runs about 4 hours, with three main shooting stops that gradually shift from sunset to full night effects. Because you’ll be moving and setting up repeatedly, it helps if you show up ready to go—no lingering, no late starts.
You can also read our reviews of more evening experiences in Oahu


China Walls: the sunset stop that sets up your whole night
Your first stop is China Walls, with about one hour on-site. This is where the tour gives you an easy win: you get a unique vantage point to photograph the sunset, then you’re already in position for the next phase once darkness arrives.
Why this stop works: it teaches timing. You’ll be learning how quickly light changes, and how to adjust your approach as the horizon cools off and the sky deepens. Sunset photography is “hard” only because people wait too long or don’t plan. Starting here means you’re practicing planning before you jump into long exposures and special effects.
A practical note: this stop has free admission. So you’re not spending time at a ticket booth or paying extra just to get to a viewpoint. It’s one less thing to juggle when the clock is moving.
Makapu‘u Point: a short gear-and-sky setup that matters
Next comes Makapu‘U Point for about 30 minutes. This is the quick-hit “get ready for the night sky” stop, where you’ll familiarize yourself with the lookout and the gear setup needed for darker shots.
In a night photography tour, the goal isn’t just getting to a scenic spot. It’s getting your settings and your stance right before you start chasing stars. A short setup stop like this is useful because it prevents the classic mistake: spending the best dark minutes still fumbling with tripod height, angles, and exposure basics.
Also, because this stop is brief, it tends to feel focused. If you’ve ever had a tour that wastes time, you’ll likely appreciate how tightly this part stays on track.
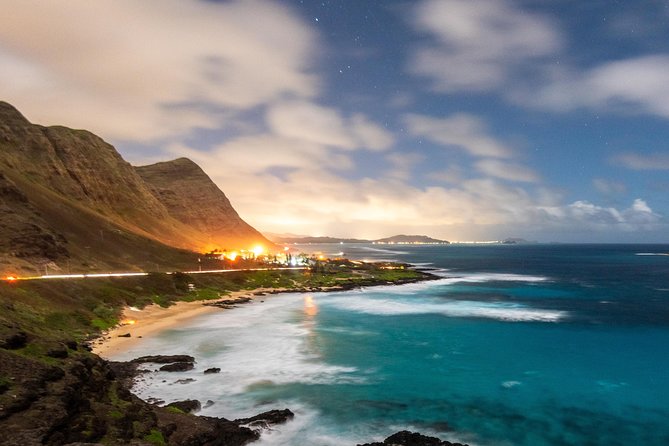
Makapu‘u Beach: stars, lighthouse views, light painting, and steel wool

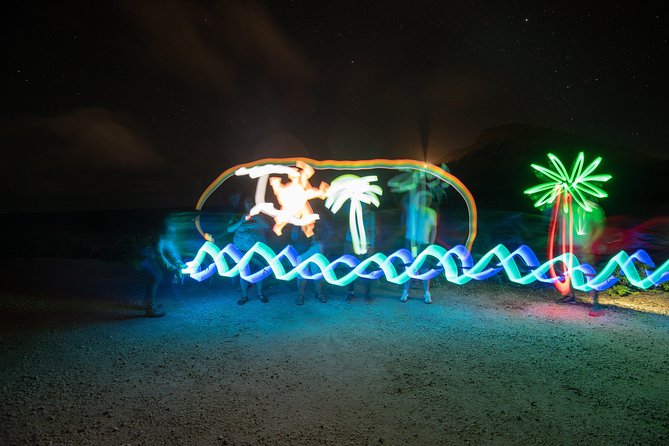
The final main stop is Makapu‘u Beach for about one hour. This is where the fun ramps up: you’ll shoot the stars and lighthouse at night, and you’ll also do light painting plus steel wool photos.
This stop is the reason to book the tour, plain and simple. Sunset sightseeing is pretty common in Hawaii. Hands-on night photography with tools is not. And you’ll get more than one creative style during that hour—so even if you’re not a “camera person,” you still end up with photos that feel different from your usual vacation shots.
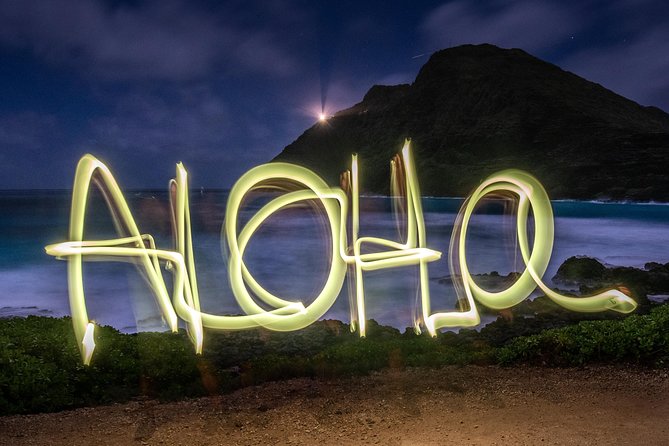
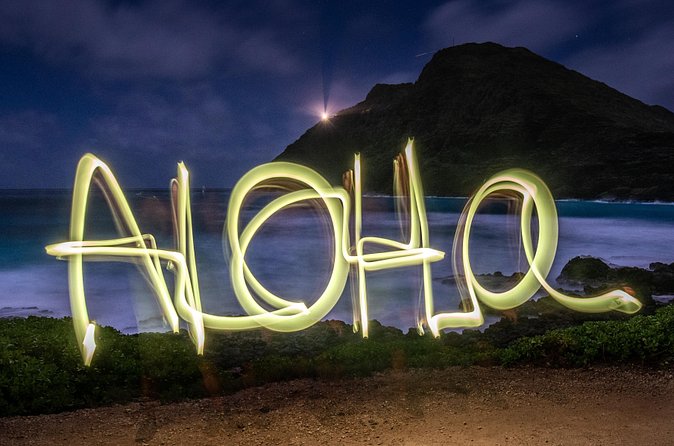
Light painting: why it’s worth the effort
Light painting can look magical in photos, but it gets easier when someone walks you through what to do. The tour includes tripods and light-painting tools, which means you’re not trying to improvise with random household items. You’ll get guidance on how to use long exposures effectively—so your results are less streaky guesswork and more intentional “draw with light.”


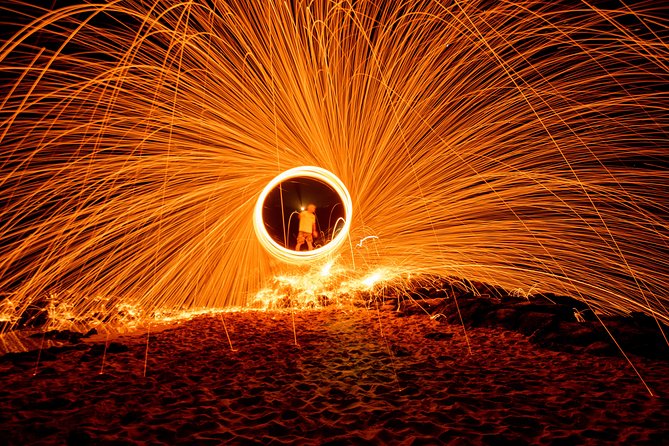
Steel wool photos: the adventurous moment
Then there’s the steel wool element—an effect that’s dramatic and a little daring. This is one of those activities where you’ll want to listen carefully to your guide and follow instructions closely. If you’re expecting something calm and quiet, this portion may surprise you. If you’re hoping for a memorable, hands-on photo story, it’s exactly the kind of moment people end up talking about later.
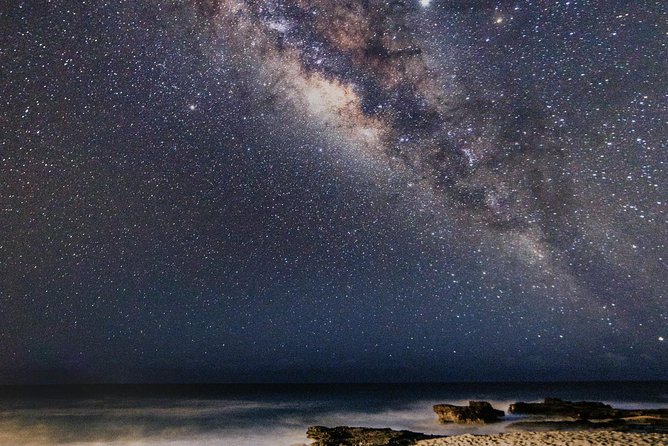
Dark-sky payoff
One review described going during a new moon and seeing a lot of stars. You can’t control lunar timing, but you can control your preparation and your focus. When the sky is darker, the same setup tends to produce stronger results—more stars, better long-exposure texture.
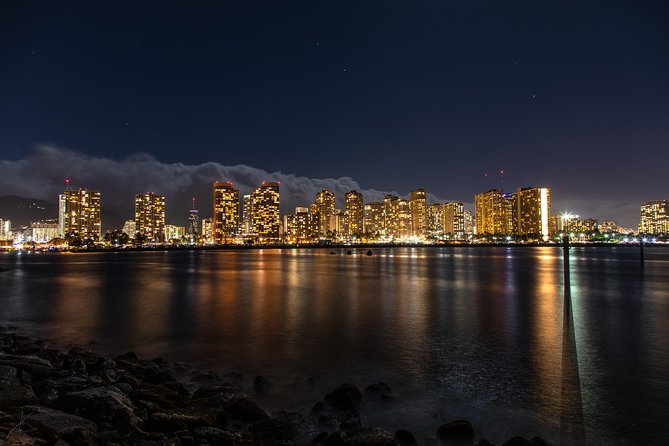
Tripods and iPhone night tips: the real skill you carry home
What makes this tour more valuable than a simple photo walk is that you learn the “how,” not only the “where.” The experience includes tripods, and many guides focus on long-exposure basics that work across cameras and phones.
Several people specifically noted guidance for iPhone night photography, including exposure-related tips and practical ways to frame shots. The vibe is: set up correctly, then make small adjustments that add up. You learn how to turn a shaky handheld moment into a steadier composition using a tripod, plus how to think about exposure so stars and night scenes don’t come out as blurry blobs.
Even if you don’t end up being the world’s next astrophotographer, this kind of instruction is gold. It helps you avoid the two biggest night-photo disappointments:
- shots that are too dark
- shots that are sharp only by accident
And because you’ll be shooting at multiple stops, you’re getting repeated practice. That repetition is what turns “I watched a tip” into “I can do this.”
Guides and group size: how Mac and Andrew shape the vibe
With a maximum of seven people, you’re not stuck in the back. It’s easier to get help with tripod placement, camera/phone settings, and how to attempt light-painting moves without feeling rushed.
Guide energy comes up a lot in the feedback. Mac is described as funny and patient, and Andrew is mentioned as engaging and accommodating—especially when it comes to helping people get iPhone-friendly night results. Other named guides (like Curt and Malcolm) also get credit for keeping the tone light and making people feel comfortable trying.
There is also at least one negative report that raised concerns about coarse jokes and driving behavior. Most accounts describe a fun, family-friendly atmosphere, but if you’re traveling with younger kids, it’s worth considering that not every guide style lands the same for every group. If you want a very strict, quiet tone, you should read the overall description carefully and ask what the night dynamic is like when you book.
What’s included, what’s not: pack smarter for a night out
Included:
- Tripods
- Light painting tools
- Pickup in select Waikiki hotels (if confirmed)
- Mobile ticket
- Admission-free stops (China Walls, Makapu‘U Point, Makapu‘u Beach)
Not included:
- Bottled water
- No food or drinks
This matters more than it sounds. A four-hour evening outing plus multiple setup moments means you’ll likely want water. If you sweat fast or get tired, plan ahead so the experience doesn’t turn into a “hangry and thirsty” situation.
Also, since there’s no food provided, you don’t want to arrive having skipped dinner. A steady energy level makes it easier to focus on photography instead of counting the minutes until you can sit down.
Weather reality: what happens if the sky doesn’t cooperate
This is a good weather experience. If conditions are poor, the tour can be canceled and you’ll be offered a different date or a full refund.
Even when weather is “acceptable,” night photography can still get tricky. Clouds reduce star visibility. Wind can make tripod stability harder. But the tour structure helps: it starts with sunset, then transitions into night effects once it’s dark enough. When the sky cooperates, you get the full arc—from horizon color to stars to light-painted images.
If you hate uncertainty, this isn’t the tour type to choose on a day you’re expecting perfect skies no matter what. If you’re flexible and ready for a night adventure, you’ll probably enjoy the mix of planning and spontaneity.
Is it worth your time in Oahu? My value check
This experience feels like strong value because you get several things for one outing:
- Multiple classic viewpoints (China Walls and Makapu‘u-area stops)
- Real hands-on night photography practice
- Tools included (tripods and light-painting gear)
- Creative effects (light painting and steel wool)
- A small group that makes instruction practical
In other words, you’re not paying to just be in the right place at the right time. You’re paying for guided shooting time plus techniques you can reuse while you’re still on Oahu. And because admission at each stop is listed as free, you’re not inflating the “real cost” with extra fees just to access viewpoints.
If you’re an absolute beginner with a phone camera, this tour can still make sense because the iPhone-focused guidance is a repeated theme. If you’re more advanced, you might enjoy the quick discipline of using a tripod and running consistent long-exposure attempts in a few different night scenarios.
Should you book the Honolulu Sunset & Light Painting Experience?
Book it if:
- you want night photos with direction, not random trial-and-error
- you enjoy creative effects like light painting and steel wool
- you’re okay with a 4-hour evening schedule that’s outdoors and photo-focused
- you like small-group attention (max seven)
Skip it or think twice if:
- you need guaranteed clear skies (the experience is weather-dependent)
- you’re not comfortable with active nighttime shooting and setup time
- you’re looking for a strictly quiet tour tone—there’s at least one complaint about guide language and driving style, even though most feedback praises humor and patience
If you fit the first list, this is one of the more memorable ways to experience Oahu after dark. You’ll trade generic sunset photos for images that actually look like you earned them with skills.
FAQ
How long is the Honolulu Sunset & Light Painting Experience?
It runs about 4 hours.
Where does the tour start and end?
It starts at Honolulu Zoo, 151 Kapahulu Ave, Honolulu, HI 96815 and ends back at the same meeting point.
Is hotel pickup available?
Pickup is offered only at selected hotels in Waikiki. You need to call to confirm your pickup location.
What equipment is included?
You get tripods and light-painting tools.
Does the tour provide bottled water or food?
No. Bottled water and food/drinks are not provided.
What happens if the weather is bad?
The experience requires good weather. If it’s canceled due to poor weather, you’ll be offered a different date or a full refund.