REVIEW · HONOLULU
Oahu Island Photography Tour
Book on Viator →Operated by Blue Hawaii Photo Tours · Bookable on Viator
This full-day Oahu photography workshop is a simple way to turn your camera into a tool, not just a phone app, and you get small-group attention from a pro guide. I love the focus on practical basics like framing, shutter speed, and focal points, taught in the field as you move around the island. One drawback to plan around: lunch is on you, with a break on the North Shore.
Second, I like how the day blends photography with real island context. If your guide is Jenny, Evan, Pattie, Marie, or Jason, expect Hawaiian history and geography to show up right where you’re shooting—not as a lecture. It’s an all-weather tour too, so you’ll want to dress for wind and cloud, not just sunshine.
In This Review
- Key things I’d watch for before you go
- From Waikiki Pickup to an 8-Hour Photo Safari
- How the Pros Teach You to See Light, Framing, and Motion
- North Shore Winter Surf: Big Waves and Better Angles
- Sacred Sites, Waterfalls, and Rainforest Stops You Might Actually Photograph
- Tripod Included, Lunch Extra: What Makes It Worth $150
- What to Pack (and what to do with your camera)
- The Small-Group Advantage: Better Help at Every Stop
- Should You Book This Oahu Photography Tour?
- FAQ
- How long is the Oahu Island Photography Tour?
- What’s included in the price?
- Do I need to bring my own camera or smartphone?
- Is lunch included?
- How many people are in the group?
- Does the tour run in bad weather?
- What’s the cancellation policy?
Key things I’d watch for before you go
- Small group size (up to 6 travelers on the max-small-group schedule) means you get help setting up, not just watching from afar
- Tripods are included, so you can practice steady shots, longer exposures, and calmer compositions
- Smartphone-to-DSLR friendly instruction covers basics and technique for different camera styles
- North Shore winter surf is part of the plan, giving you motion, texture, and big-wave angles
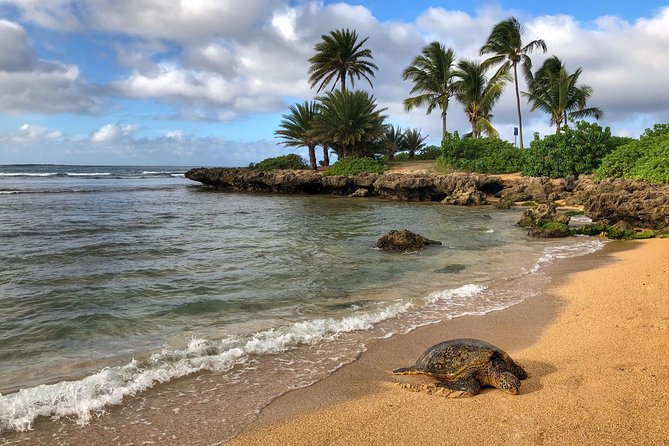
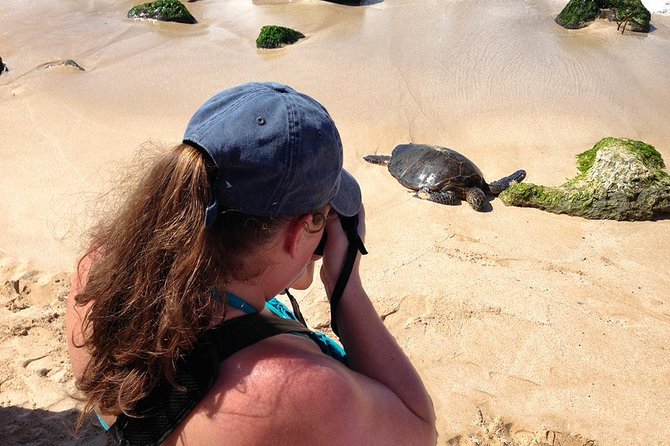
- You’ll look for wildlife such as Hawaiian monk seals and green sea turtles when conditions allow
- A guide who ties it together—photos plus Oahu history and geography—keeps stops meaningful
From Waikiki Pickup to an 8-Hour Photo Safari
The day starts in Waikiki with hotel pickup in a spacious, air-conditioned van. From there, you’re on the move around Oahu, which is exactly how you get variety: coastal views, beaches, sacred sites, and dramatic terrain all in one shot. The tour runs about 8–8.5 hours, so it feels like an island day first, with photography lessons woven through it.
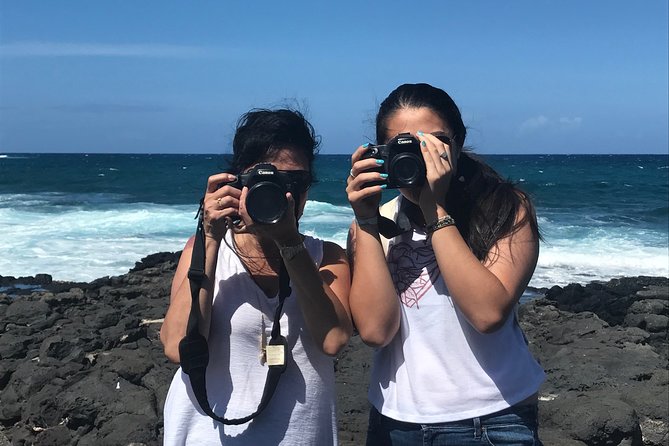
Group size stays small, which matters more than people think. When you’re trying to frame a shot or figure out settings, you don’t want a crowd blocking the view or a guide rushing to the next stop. This tour is built so your guide can help you set up and aim, whether you’re on a smartphone, a point-and-shoot, or a DSLR.
You’ll also want to be ready for real walking. Closed-toed shoes are strongly recommended, and you should bring sun protection like a hat and sunscreen. If you’re thinking this is mostly “sit and shoot,” adjust your expectations—this is a photo workshop in motion.
You can also read our reviews of more photography tours in Honolulu

How the Pros Teach You to See Light, Framing, and Motion
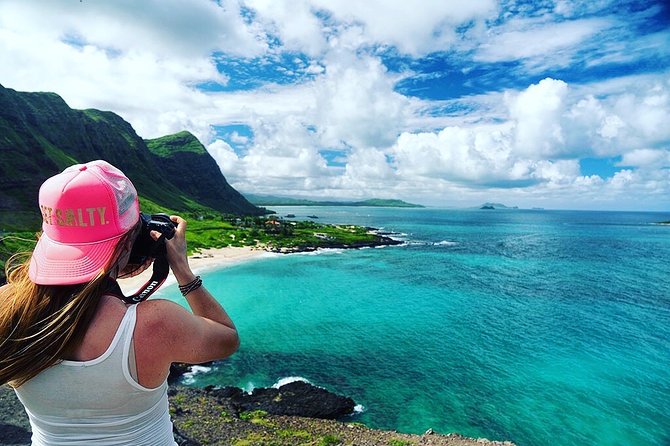
The heart of this tour is the way the instruction happens in real conditions, with real subjects. Your guide will point out details that are easy to miss when you’re just scanning for a pretty view. Expect the basics of great images to be explained in plain terms: how light changes the look, and how framing and composition help you control what the viewer notices.
You’ll also work with the mechanics of photography: concepts like shutter speed, focal points, and how to think about what to keep sharp versus what to soften. One of the most useful parts for many people is that the guide covers different skill levels. Beginners get a handle on what the settings actually do, while more advanced shooters can use the stops to test ideas in the field.
If you’re a phone photographer, you’re not treated like a second-class participant. You’ll still get tips for camera use on a smartphone—things like settings you might not realize are available. That’s a big deal because Oahu is full of situations where the phone can nail the shot if you guide it with the right technique.
And yes, tripods matter here. Since they’re included, you can practice stability, long exposures, and calmer compositions without feeling like you have to guess your gear setup. It also helps you take your time with framing when the scene is busy.
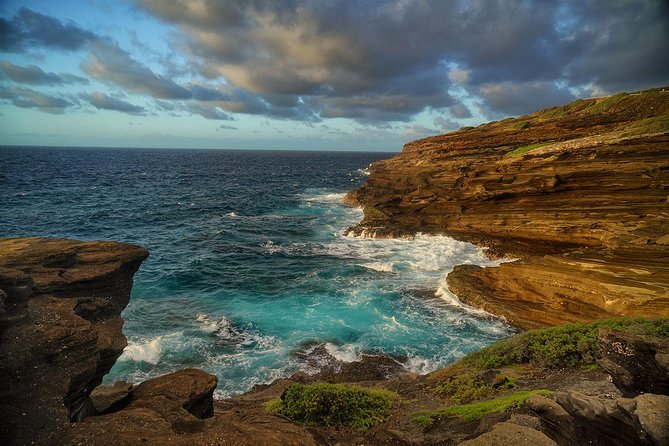
North Shore Winter Surf: Big Waves and Better Angles
The North Shore is one of the best places in the world to practice action and motion. The tour’s route includes famous winter surf beaches, and when the season lines up, you’ll see big waves and fearless surfers. Even if you don’t get perfect “hero” moments every time, this section of the day is gold for learning how to plan a shot.
This is where shutter speed becomes more than a buzzword. Moving water and athletes force you to choose: do you want frozen motion, or a softer sense of movement? Your guide helps you think through what to try for the conditions you’re seeing, including how to position yourself so the background doesn’t fight your subject.
Weather can shape the experience. One of the notable patterns from past days is that the first part of the tour may be cloudy, but the guide adjusts the plan and still finds workable angles. That’s part of why a guided day works better than trying to “wing it” with only your own trial-and-error.
If you’re hoping to shoot coastline textures, contrast, and surfers against dramatic water, this is the section that delivers the most visual variety. Plus, it’s a nice contrast to Waikiki’s busier vibe: you’re farther from crowds, and the scenery feels more raw and open.
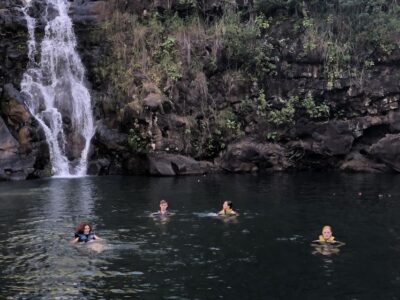
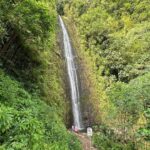
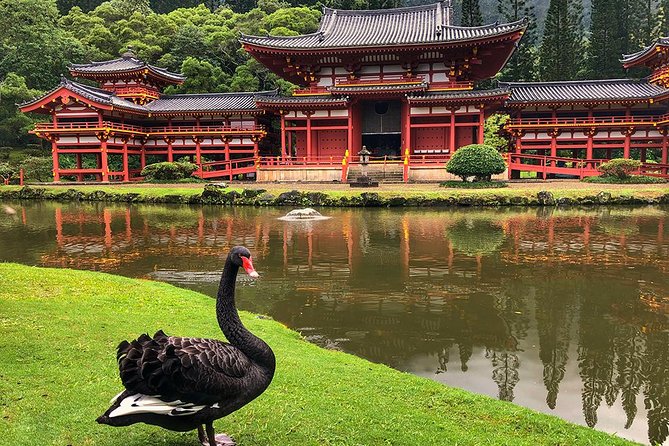
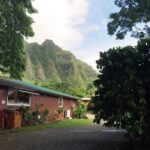
Sacred Sites, Waterfalls, and Rainforest Stops You Might Actually Photograph
Oahu isn’t one kind of place, and the tour keeps that promise. Depending on the day and time of year, the route can include spots tied to ancient volcanoes, lush rainforest, sacred Hawaiian sites, and areas with sweeping mountain or valley views. You might also encounter flowing waterfalls or heiaus (sacred places) along the way.
Here’s why that matters for your photos: each environment teaches a different lesson. Volcano and coastal areas encourage wide compositions and strong horizon choices. Rainforest and waterfall scenes reward your attention to light direction, contrast, and depth. Sacred sites are a reminder to slow down and frame with respect, so you capture the setting without turning it into a background.
The tour also keeps a “subject variety” rhythm. Instead of repeating the same kind of shot all day, you get different challenges: ocean vistas, sheltered scenes, and places where the background is full of distractions. That variety helps you build real skills faster than you would with a single location.
Wildlife is also part of the experience when conditions allow. You may look for Hawaiian monk seals and green sea turtles. In at least one past day, sea turtles showed up during the North Shore portion, which is the kind of moment you remember—and a reminder to always be ready with your framing, not just your camera ready.
Tripod Included, Lunch Extra: What Makes It Worth $150
At $150 per person, this tour sits in the “pay for value, not luxury” category. What you’re getting isn’t just a ride; it’s instruction plus gear support plus hotel pickup. The hotel pickup and drop-off saves time and stress, especially in Waikiki where traffic and parking can eat your morning.
Tripods are included, which is a real cost saver if you don’t already own one. And you also get a professional guide who helps you translate what you see into what your camera captures—whether you’re using a smartphone or a more serious camera. For many people, that coaching is the difference between a decent souvenir photo and an image you’d actually want to print.
What you should mentally budget: lunch is not included. The tour does stop for a break on the North Shore for you to eat at your own expense. That’s not a dealbreaker, but it does mean the true “day cost” is $150 plus whatever you choose to spend for food.
Also note: you bring your own camera or smartphone. The tour won’t hand you a camera, but it will hand you the technique and the coaching to use what you already have.


What to Pack (and what to do with your camera)

This isn’t a “barely bring anything” kind of tour. You’ll be outside for most of the day and you’ll likely change locations multiple times, so pack for comfort and sun.
Here’s what the tour specifically calls out:
- Wear comfortable, closed-toed walking shoes
- Bring a hat and sunscreen
- Dress for all weather conditions (it runs in cloudy/rainy conditions too)
- Bring your own camera or smart phone
- Expect to use tripods that are provided
Now for the photo part. The fastest way to improve is to pick a simple goal at each stop. For example: one stop for sharp landscapes, one for motion water, one for portraits or details, and one for low-light or shaded areas (when you find them). When your guide calls out settings like shutter speed or focal points, you’re not just learning—you’re applying.
If your guide is Evan, one past experience highlighted how he made sure everyone got the most from each location with both compositional and technical advice. Guides like Jenny and Marie are known for weaving in Hawaiian history and culture right alongside photo tips, so your eyes start to connect the scene to the context.
That’s the real payoff: you end the day with photos you understand, not just photos you got.
The Small-Group Advantage: Better Help at Every Stop
This tour is built around the idea that your camera questions don’t wait. With a max of around 6 travelers, your guide can help you troubleshoot while everyone else keeps moving. You’re not stuck on the sidelines.
This also changes the vibe. Many people like tours where the group is calm and the guide isn’t rushing. A small group helps you actually watch what the guide is doing, then try it yourself. It’s also easier to get positioned for the “right angle” when you’re not competing with a large busload.
If you’ve never taken a photography workshop before, this format is a safe starting point. And if you already know your way around a camera, the small group still helps because your guide can respond to your questions instead of running through a one-size-fits-all checklist.
Should You Book This Oahu Photography Tour?
I think it’s a strong book if you want a full-day Oahu experience with real teaching built in. You’ll likely appreciate it most if you care about getting better photos—on a smartphone or a DSLR—and you don’t want to waste your trip guessing settings alone.
Book it especially early in your vacation. Learning how to see light and composition on day one makes the rest of your Oahu days more fun because you start taking better shots without needing the guide for every frame.
Skip it if you’re mainly looking for a relaxed, scenic drive with minimal instruction. The tour is hands-on by design, and you’ll get the best results when you’re willing to stop, set up, and try the tips as you go.
FAQ
How long is the Oahu Island Photography Tour?
The tour runs about 8 hours (and is described as approximately 8.5 hours).
What’s included in the price?
The price includes hotel pickup and drop-off, a professional guide, and tripods.
Do I need to bring my own camera or smartphone?
Yes. You’ll be required to bring your own camera or smart phone.
Is lunch included?
No. Lunch is not included, but there is a break for lunch on the North Shore (own expense).
How many people are in the group?
The tour keeps it small, with a maximum of 6 travelers noted in the information you provided (and a maximum of 7 per booking is also listed).
Does the tour run in bad weather?
The tour operates in all weather conditions, so you should dress appropriately.
What’s the cancellation policy?
Free cancellation is available up to 24 hours in advance for a full refund. If you cancel less than 24 hours before the start time, the amount paid is not refunded.